Threaded inserts in 3D Printed parts
Threaded inserts are often used in 3D prints to add threads to plastic parts, allowing you to securely attach bolts, screws, or other fasteners. This can be especially useful when you need to assemble or disassemble 3D-printed components or when you want to avoid damaging the plastic threads by repeatedly screwing and unscrewing bolts directly into the plastic.
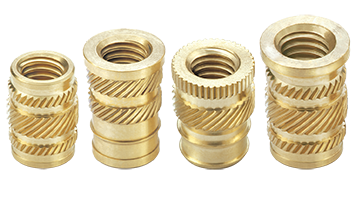
Heat-set threaded inserts - these are great for filament prints (PLA, ABS, Onyx, etc.)
Using threaded inserts in 3D prints:
-
Select the Right Threaded Insert: There are various types of threaded inserts available, including heat-set inserts, press-fit inserts, and self-tapping inserts. The type you choose depends on your project and the material you are printing with. Heat-set inserts are commonly used in 3D printing and are designed to melt into the plastic when heated. The manufacturer should provide the diameter of the hole you need to make for the insert to properly join with the part.
- Heat set inserts for plastics on McMaster
- Amazon also has plenty
-
Design Your 3D Print: Before you start printing, you need to incorporate the necessary features into your 3D model to accommodate the threaded insert. Typically, this involves creating a hole or cavity where the insert will be placed. The hole should be designed to match the size and shape of the insert you're using.
-
Print the Part: Once your 3D model is ready, print it using your chosen 3D printing material and settings. Ensure that the hole or cavity for the threaded insert is well-positioned and accurately sized to fit the insert.
-
Prepare the Insert: If you're using heat-set inserts, you will need a soldering iron or a dedicated heat-set insert tool. Heat the insert to the appropriate temperature (usually specified by the manufacturer) until it's hot enough to melt into the plastic.
-
Insert the Threaded Insert: Carefully press the heated insert into the hole or cavity you designed for it. Apply gentle pressure to ensure it seats properly and melts into the plastic. Hold it in place until the plastic cools and solidifies, securing the insert in position.
-
Test the Threads: After the insert has cooled and solidified, test the threads by screwing in the desired fastener (e.g., a bolt or screw). If done correctly, the threads should securely hold the fastener in place.
Tips for using threaded inserts in 3D prints:
-
Ensure that the hole for the insert is the correct size. It should be slightly smaller than the insert's outer diameter to provide a snug fit. The necessary diameter may be given by the seller/manufacturer.
-
Pay attention to the orientation of the insert within the printed part to ensure proper alignment with other components.
-
Consider the material compatibility of the threaded insert and your 3D printing material. Some inserts are designed for specific plastics, so choose accordingly.
-
Practice on scrap pieces or test prints before inserting threaded inserts into your final project to get a feel for the process.
Threaded inserts in resin printed parts
It is possible to use heat-set inserts in resin parts but you do not want to use heat to insert them. There are a few design considerations to make them work effectively in resin parts. (Source: How Strong are Heat-Set Inserts in Resin 3D Prints?)
-
Select the Right Threaded Insert: Design the holes to fit the profile of the threaded inserts more closely than you would in a PLA part.
-
Design Your 3D Print: Before you start printing, you need to incorporate the necessary features into your 3D model to accommodate the threaded insert. Typically, this involves creating a hole or cavity where the insert will be placed. The hole should be designed to match the size and shape of the insert you're using.
Using threaded inserts in 3D printing can enhance the durability and functionality of your printed parts, making them more versatile for various applications.
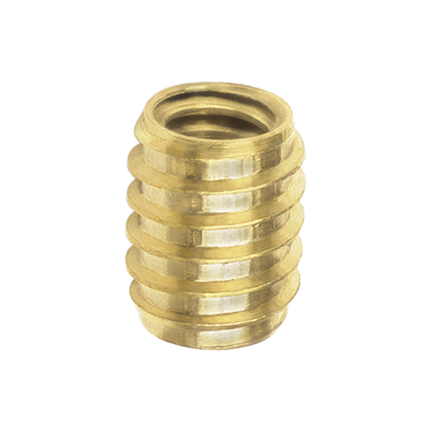
Self tapping threaded insert