Arduino Workshop Outline
Description
Arduino microcontrollers changed the game for physical computing, and lowered the barriers to entry for the creation of functional input-output systems. Whether you’ve heard of Arduino and have just never had the chance to try it, or would like to learn a little about electronics to improve your prototyping game, this workshop will show you how to use microcontrollers in your projects. We'll cover the basics of input/output systems by controlling lights, motors, or other devices.
Bring your laptop - all other materials will be provided.
Note: If you've signed up but find you're unable to attend any workshop, please delete your reservation as soon as possible to allow waitlisted individuals time to join.
Project Outcomes
- One should be able to feel comfortable with experimenting with Arduino for prototyping and testing various ideas
Goals
- Demonstrate how easy it is to embed electronics for a desired outcome
- aesthetic craftsmanship and simplicity
Parts:
- Arduino
- USB-A to USB-B cable
- Breadboard
- Jumper wires
- Laptop (supplied by student)
- USB-C to USB-B adapter (if your laptop only has USB-C)
Sources
Presentation
Arduino Presentation
Advanced Slides documentation
What is an Arduino?
First, what is a microcontroller? Originally, microcontrollers were one-time-programmable logic controllers. Some code is compiled and loaded into the device and that code is the logic of how input and output signals are handled. Some version of a microcontroller is at the heart of any embedded system - e.g. home appliances, cars, gaming devices, etc.
The first reprogrammable microcontroller was the Parallax Board of Education[1].
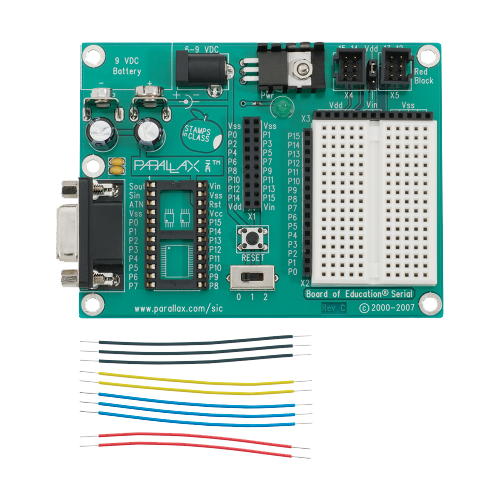
The re-programmable Parallax Board of Education and jumper wires
Arduino is an open-source electronics platform based on easy-to-use hardware and software. Arduino boards are able to read inputs - light on a sensor, a finger on a button, or a Twitter message - and turn it into an output - activating a motor, turning on an LED, publishing something online. You can tell your board what to do by sending a set of instructions to the microcontroller on the board. To do so you use the Arduino programming language (based on Wiring), and the Arduino Software (IDE), based on Processing. Once finished with a prototype, the board can be reused in the next project and new code sent to the microcontroller.

An early Arduino board
Arduino was born at the Ivrea Interaction Design Institute in Italy as an easy tool for fast prototyping, aimed at students without a background in electronics and programming. As soon as it reached a wider community, the Arduino board started changing to adapt to new needs and challenges, differentiating its offer from simple 8-bit boards to products for IoT applications, wearable, 3D printing, and embedded environments.[2]
Modularity is the main reason why Arduino and the vocabulary of components that interface with it have become well known as tools for prototyping. It is an easy way to test an idea, create a working concept design.
IDE and Web Editor
Workshop Outline
Introduction to Arduino and Basics of Electronics
- Workshop Introduction
- Welcome participants and introduce the workshop's goals and structure.
- Briefly explain the project as the desired outcome.
- Arduino Fundamentals
- What is Arduino? Understanding its history and applications.
- What is an embedded system?
- Overview of Arduino IDE (Integrated Development Environment) and its features.
- Electronics Basics
- Introduction to essential electronic components: resistors, LEDs, breadboards, etc.
- Programming Arduino
- Basics of Arduino programming using C/C++.
- Writing, compiling, and uploading a simple "Hello World" program to the Arduino board.
- Interfacing Components
- How to connect and control various components: buttons, sensors, and actuators.
- Hands-on activity: Building a simple LED circuit and uploading a basic program.
- Practical exercise: Creating a button-controlled LED.
- Practical exercise: Creating a potentiometer-controlled LED.
- Project System Overview
- Detailed explanation of the project's concept and components.
- Discuss the significance of each sensor and actuator in the context of the project.
- Sensor Integration
- Connecting and calibrating sensor.
- Reading analog sensor data and interpreting it.
- Actuator Integration
- Connecting and controlling a servo.
- Implementing logic for automated watering based on sensor data.
- Coding the Project
- Writing the Arduino code for the Smart Plant Watering System.
- Incorporating sensor readings, control logic, and actuator control.
- Project Testing and Troubleshooting
- Assembling the complete project and wiring.
- Testing the system, identifying issues, and debugging the code.
- Project Presentation and Reflection
- Each participant presents their Smart Plant Watering System.
- Q&A and open discussion on challenges faced and lessons learned.
- Future Applications and Beyond
- Inspiring participants to explore further Arduino projects and applications.
- Sharing resources for continued learning.
Code
/*
  AnalogReadSerial

  Reads an analog input on pin 0, prints the result to the Serial Monitor.
  Graphical representation is available using Serial Plotter (Tools > Serial Plotter menu).
  Attach the center pin of a potentiometer to pin A0, and the outside pins to +5V and ground.

  This example code is in the public domain.

  https://www.arduino.cc/en/Tutorial/BuiltInExamples/AnalogReadSerial
*/

// the setup routine runs once when you press reset:
void setup() {
  // initialize serial communication at 9600 bits per second:
  Serial.begin(9600);
}

// the loop routine runs over and over again forever:
void loop() {
  // read the input on analog pin 0:
  int sensorValue = analogRead(A0);
  // print out the value you read:
  Serial.println(sensorValue);
  delay(1);  // delay in between reads for stability
}
"15 Years of SparkFun: The Origin Story", https://www.sparkfun.com/news/2571#yearOrigin ↩︎
"What is an Arduino?", https://docs.arduino.cc/learn/starting-guide/whats-arduino ↩︎