Arduino Presentation
Arduino
The Ins and Outs
of Inputs and Outputs

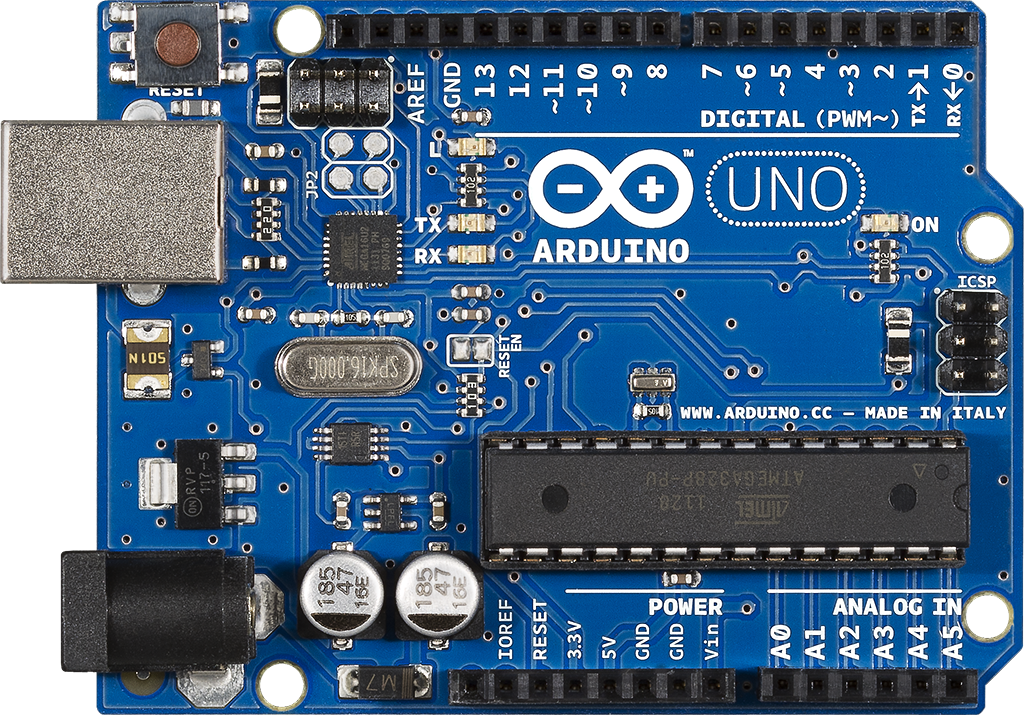
What is Arduino?

Embedded system
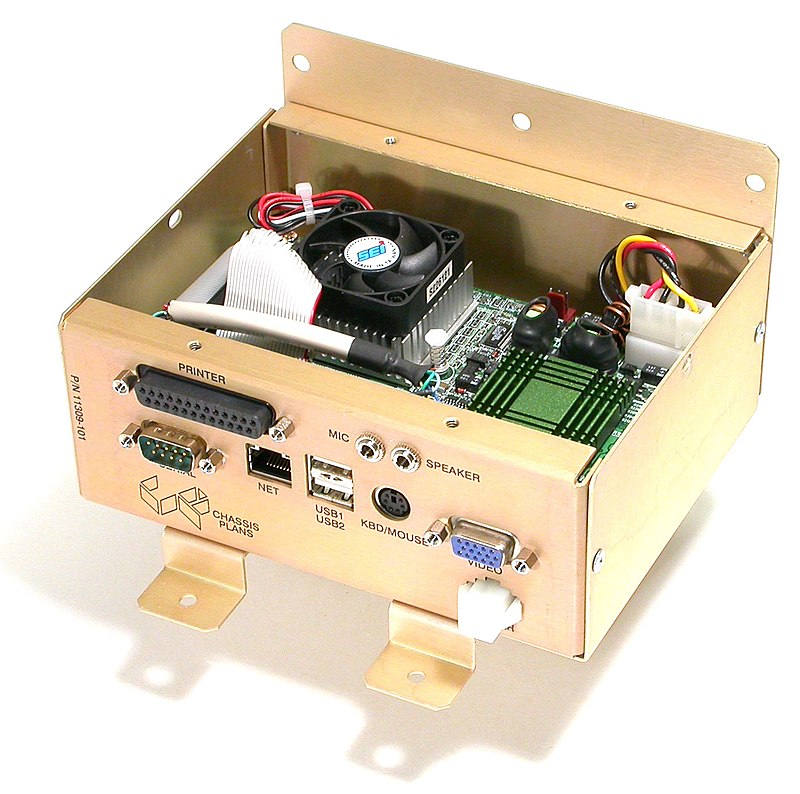
Accupoll Electronic Voting Machine
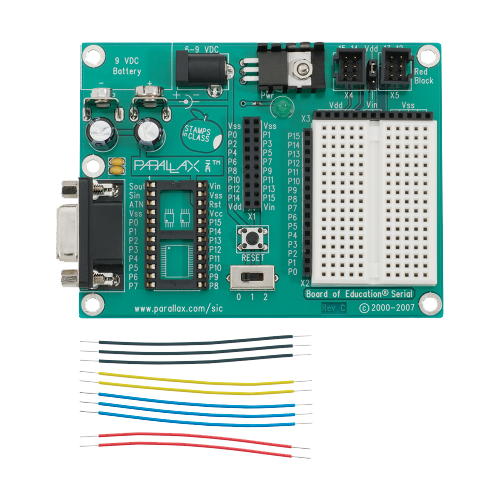
Parallax Board of Education
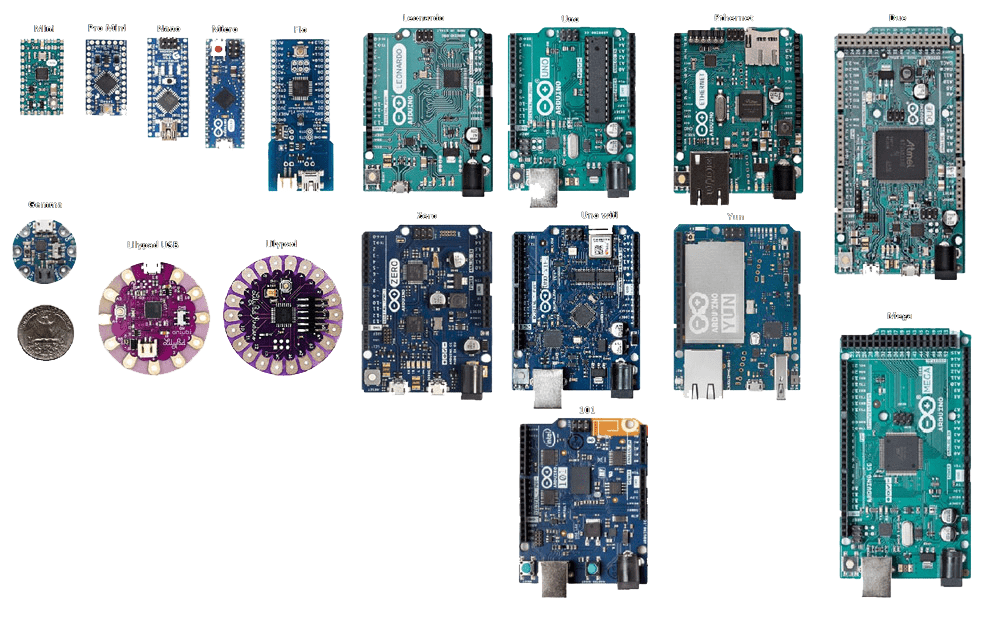
Varieties of Arduinos found in the wild
For a a cool $27
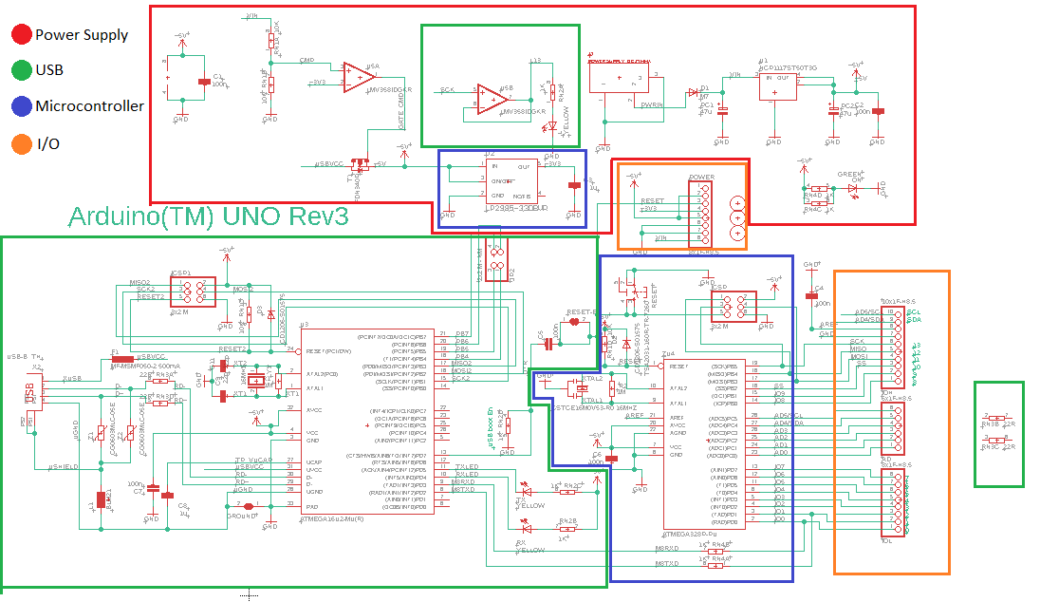
Arduino Schematic

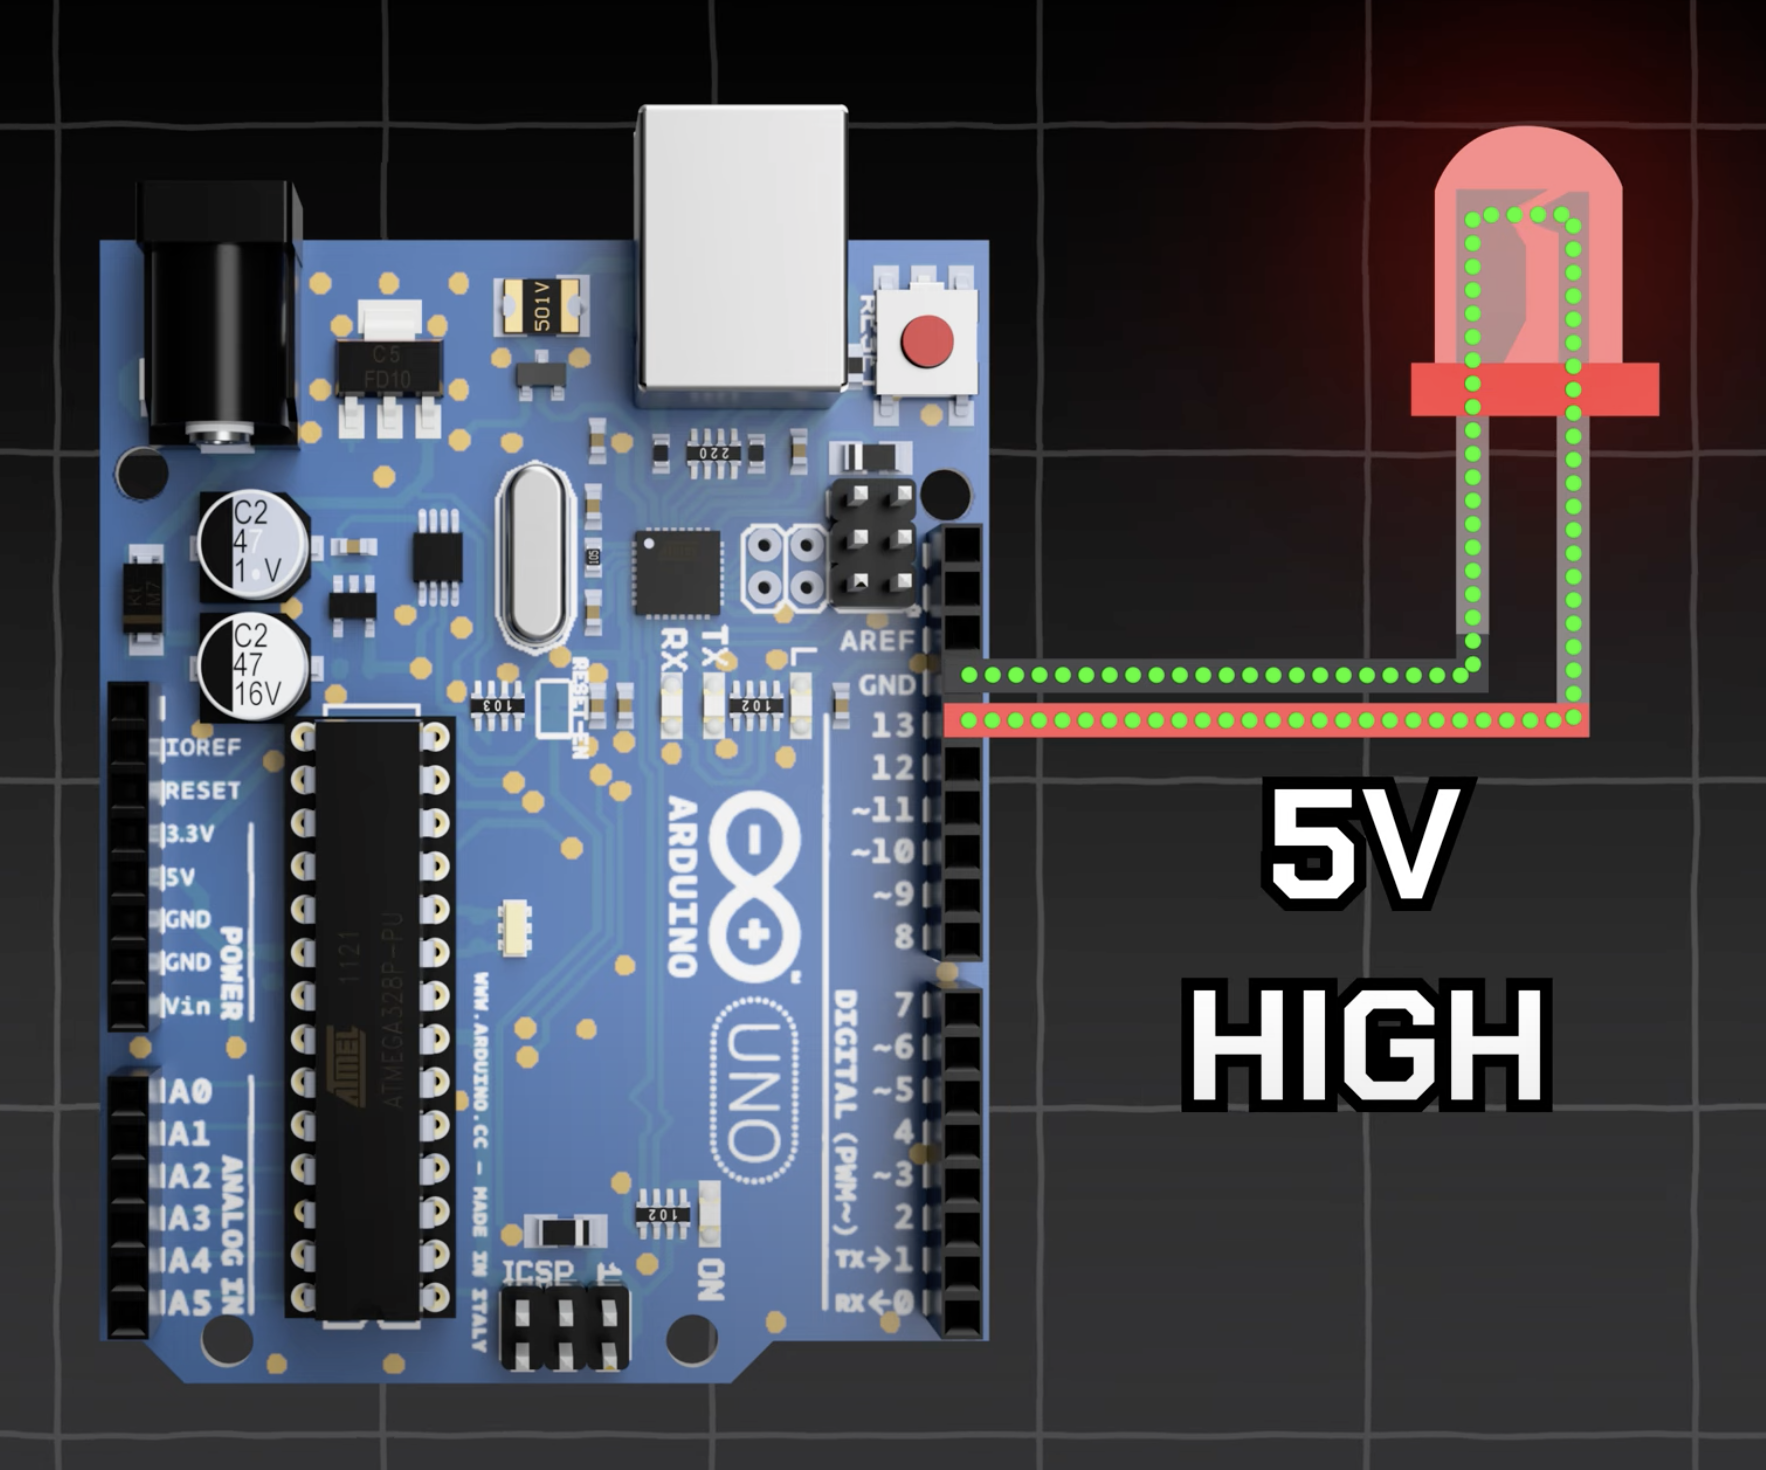
Digital Pin HIGH
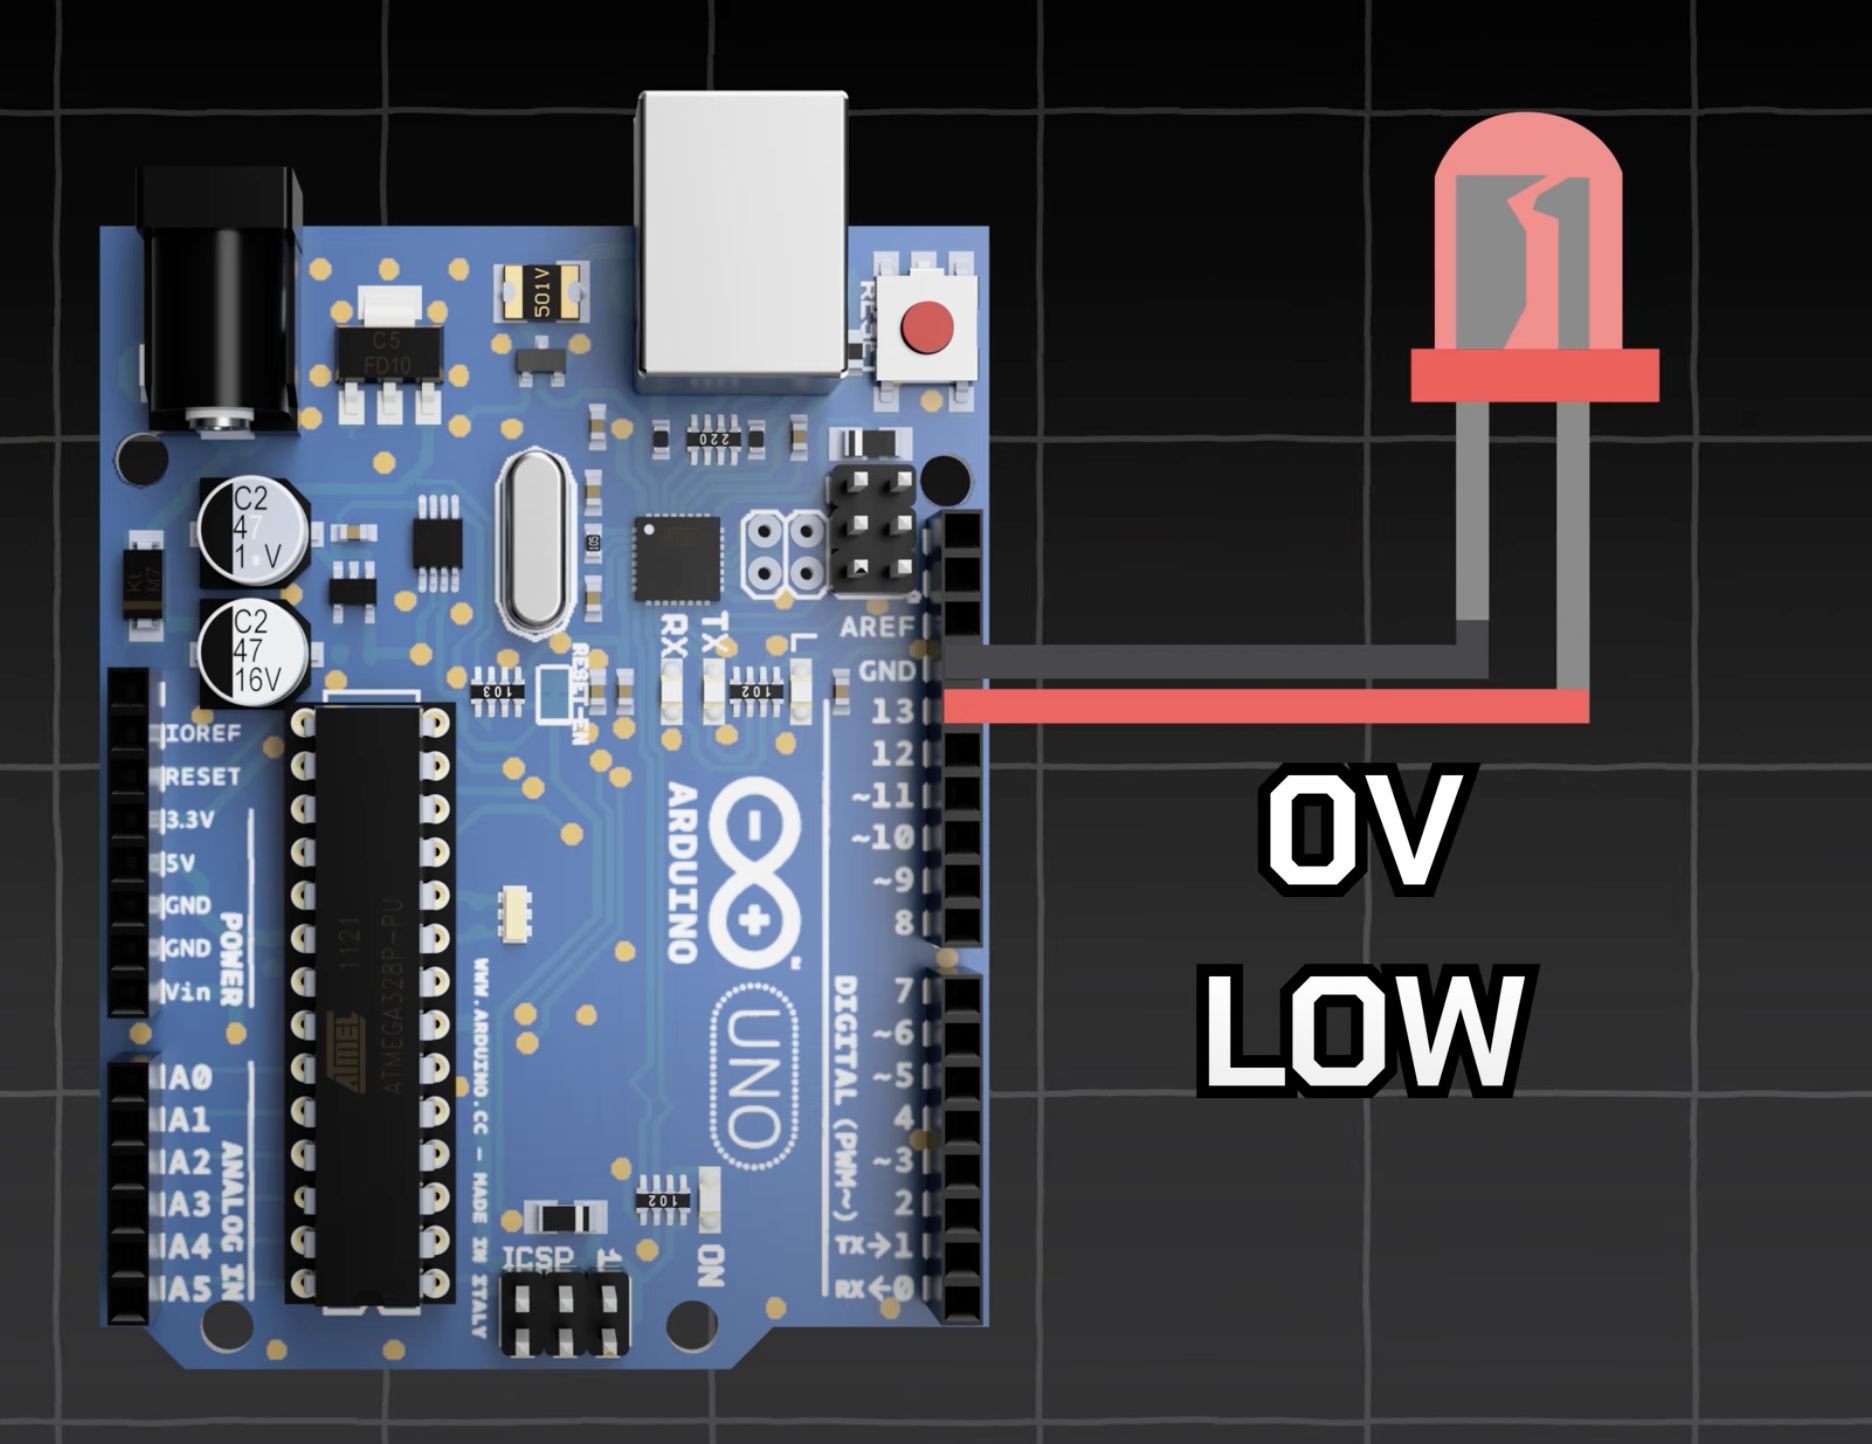
Digital Pin LOW
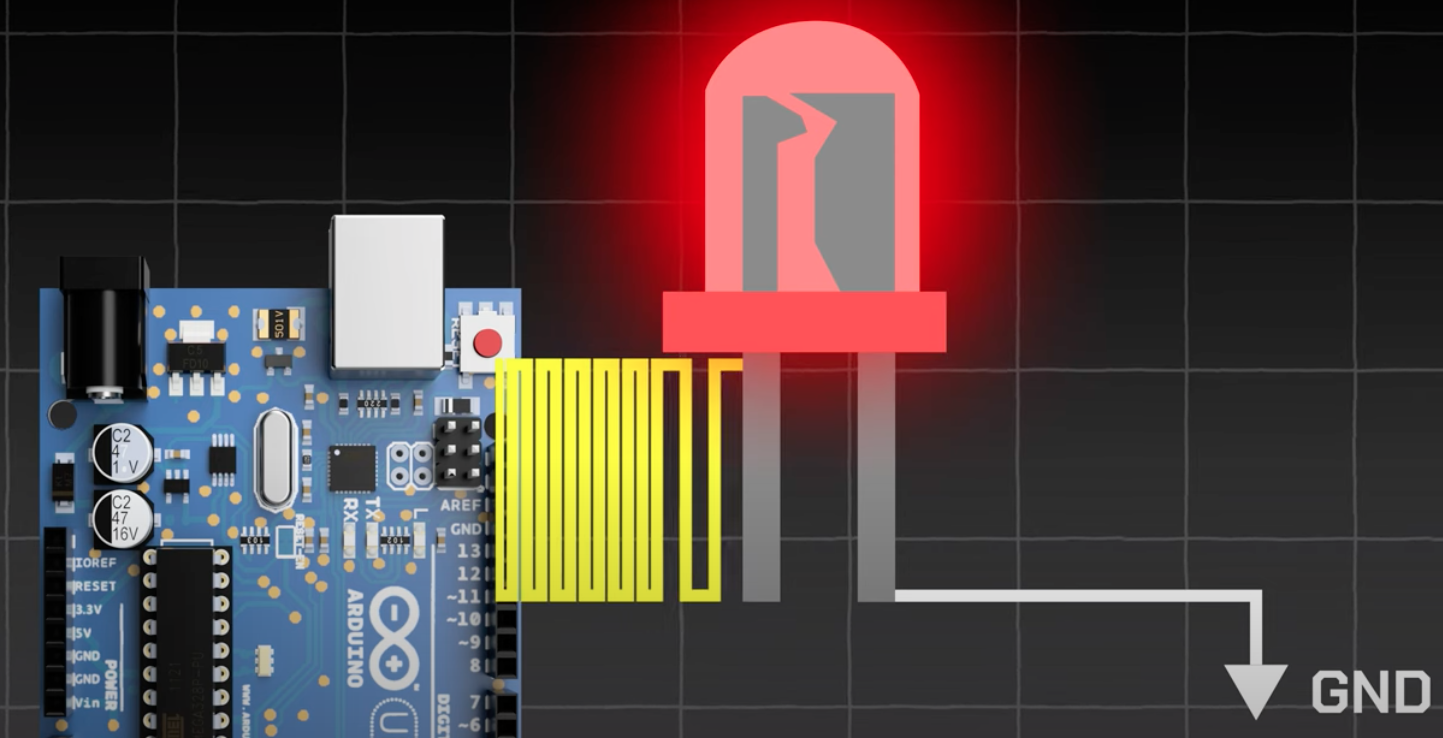
Pulse Width Modulation (PWM) on
~ pins
Analog Inputs
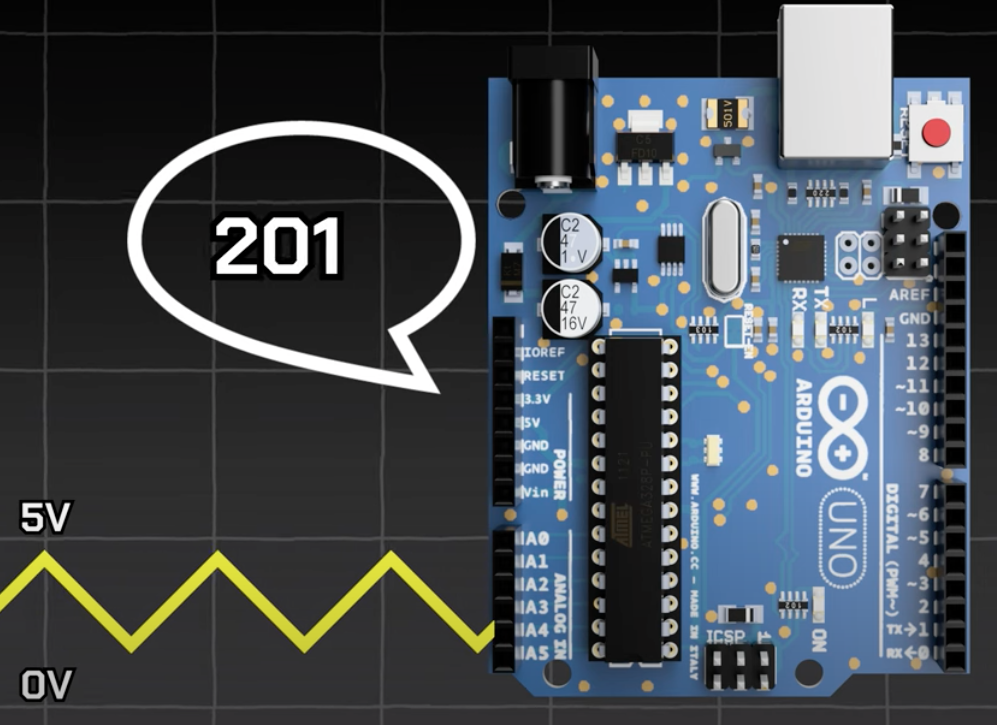

Analog pins use a 10 bit ADC
Voltage is measured as 0 - 1024

Inputs and Outputs
Find inputs and outputs at Sparkfun
and Adafruit
Arduino IDE (arduino.cc/en/software)
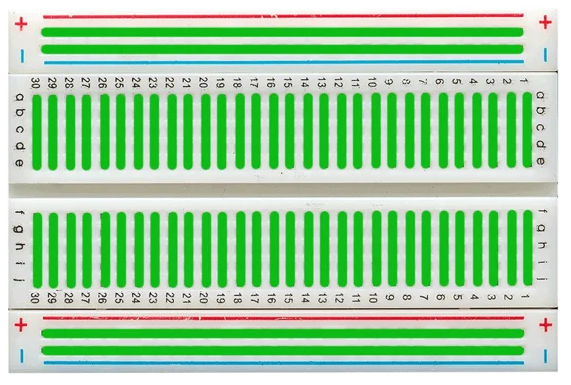
Breadboard
Basic Safety Recommendations When Using an Arduino
-
⚠️ Avoid short circuits: Do not let the 5V or 3V wires (usually red) and ground wires (usually black) touch. This will cause a short circuit and can damage your Arduino.
-
⚠️ Your Work Surface Matters: Make sure that the surface you are working on is not conductive as this can also cause short circuits. The best materials for work surfaces are wood or laminate. One can add an anti-static mat (ESD mat) to prevent the buildup of static electricity that could damage sensitive components.
-
⚠️ Disconnect Power During Assembly: Always disconnect the Arduino from its power source (USB or external) when making or modifying circuit connections.
-
⚠️ Use Proper Resistors: Always include resistors when using LEDs or other components to limit current and prevent damage.
-
⚠️ Avoid High Voltages: Do not expose the Arduino to voltages higher than 5V (or 3.3V for some boards) on its digital pins.
-
⚠️ Prevent Overloading Pins: Arduino pins can typically handle a maximum of 40mA, but it's safer to keep the current below 20mA per pin. Use transistors, relays, or MOSFETs to control higher loads.
-
⚠️ Handling malfunctions and errors: Disconnect power immediately and check connections.
-
⚠️ Component Datasheets: Manufacturer's datasheets are very helpful when you need to understand a component's specifications and limitations of the components you’re using (e.g. power requirements, what each pins are for).
// the setup function runs once when you press reset or power the board
const int ledPin = 13;   // or can be set to LED_BUILTIN to blink the built-in LED

void setup() {
  // initialize digital pin LED_BUILTIN as an output.
  pinMode(LED_BUILTIN, OUTPUT);
}

// the loop function runs over and over again forever
void loop() {
  digitalWrite(LED_BUILTIN, HIGH);  // turn the LED on (HIGH is the voltage level)
  delay(1000);                      // wait for a second
  digitalWrite(LED_BUILTIN, LOW);   // turn the LED off by making the voltage LOW
  delay(1000);                      // wait for a second
}
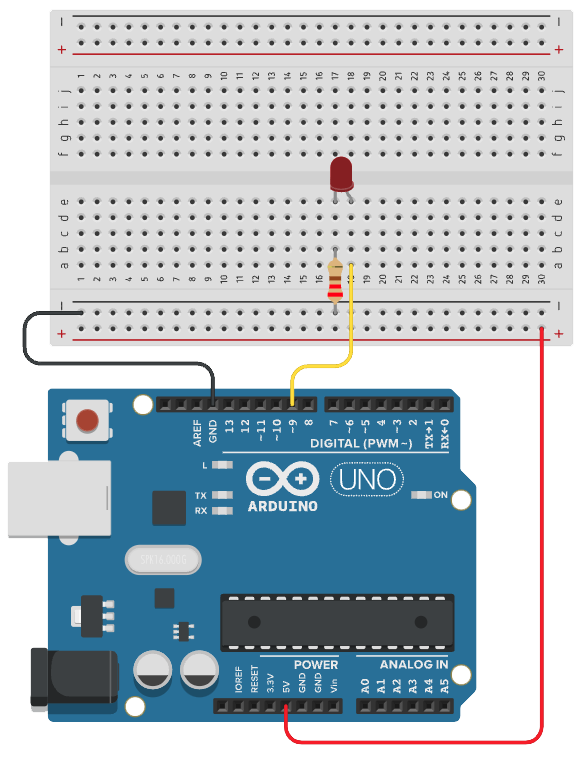
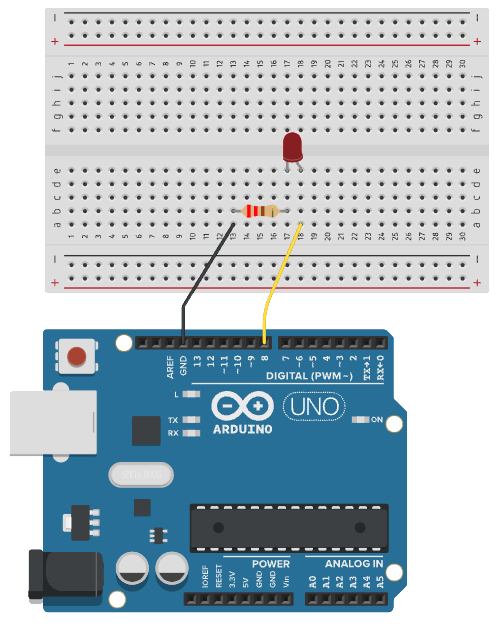
LED PWM circuit
LED PWM fade code:
int ledPin = 9;  // LED connected to digital pin 9

void setup() {
  // nothing happens in setup
}

void loop() {
  // fade in from min to max in increments of 5 points:
  for (int fadeValue = 0; fadeValue <= 255; fadeValue += 5) {
    // sets the value (range from 0 to 255):
    analogWrite(ledPin, fadeValue);
    // wait for 30 milliseconds to see the dimming effect
    delay(30);
  }

  // fade out from max to min in increments of 5 points:
  for (int fadeValue = 255; fadeValue >= 0; fadeValue -= 5) {
    // sets the value (range from 0 to 255):
    analogWrite(ledPin, fadeValue);
    // wait for 30 milliseconds to see the dimming effect
    delay(30);
  }
}
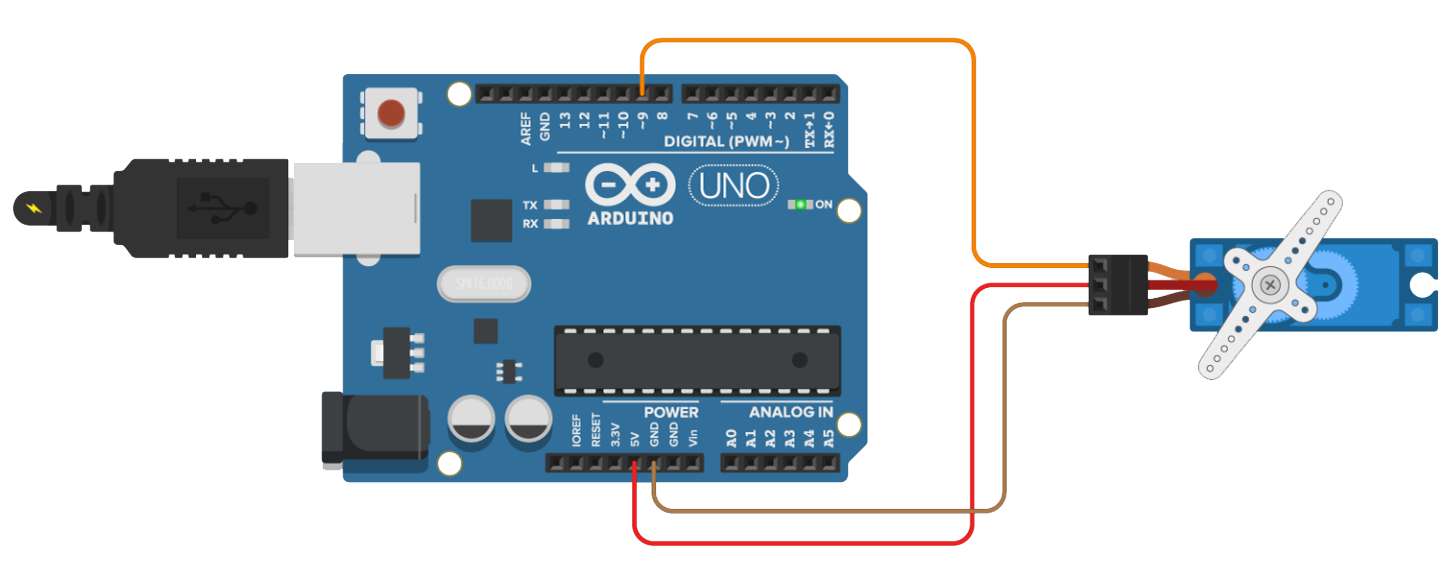
Positional Servo
/* Sweep
 by BARRAGAN <http://barraganstudio.com>
 This example code is in the public domain.

 modified 8 Nov 2013
 by Scott Fitzgerald
 https://www.arduino.cc/en/Tutorial/LibraryExamples/Sweep
*/

#include <Servo.h>

Servo myservo;  // create servo object to control a servo
// twelve servo objects can be created on most boards

int pos = 0;    // variable to store the servo position

void setup() {
  myservo.attach(9);  // attaches the servo on pin 9 to the servo object
}

void loop() {
  for (pos = 0; pos <= 180; pos += 1) { // goes from 0 degrees to 180 degrees
    // in steps of 1 degree
    myservo.write(pos);              // tell servo to go to position in variable 'pos'
    delay(15);                       // waits 15 ms for the servo to reach the position
  }
  for (pos = 180; pos >= 0; pos -= 1) { // goes from 180 degrees to 0 degrees
    myservo.write(pos);              // tell servo to go to position in variable 'pos'
    delay(15);                       // waits 15 ms for the servo to reach the position
  }
}
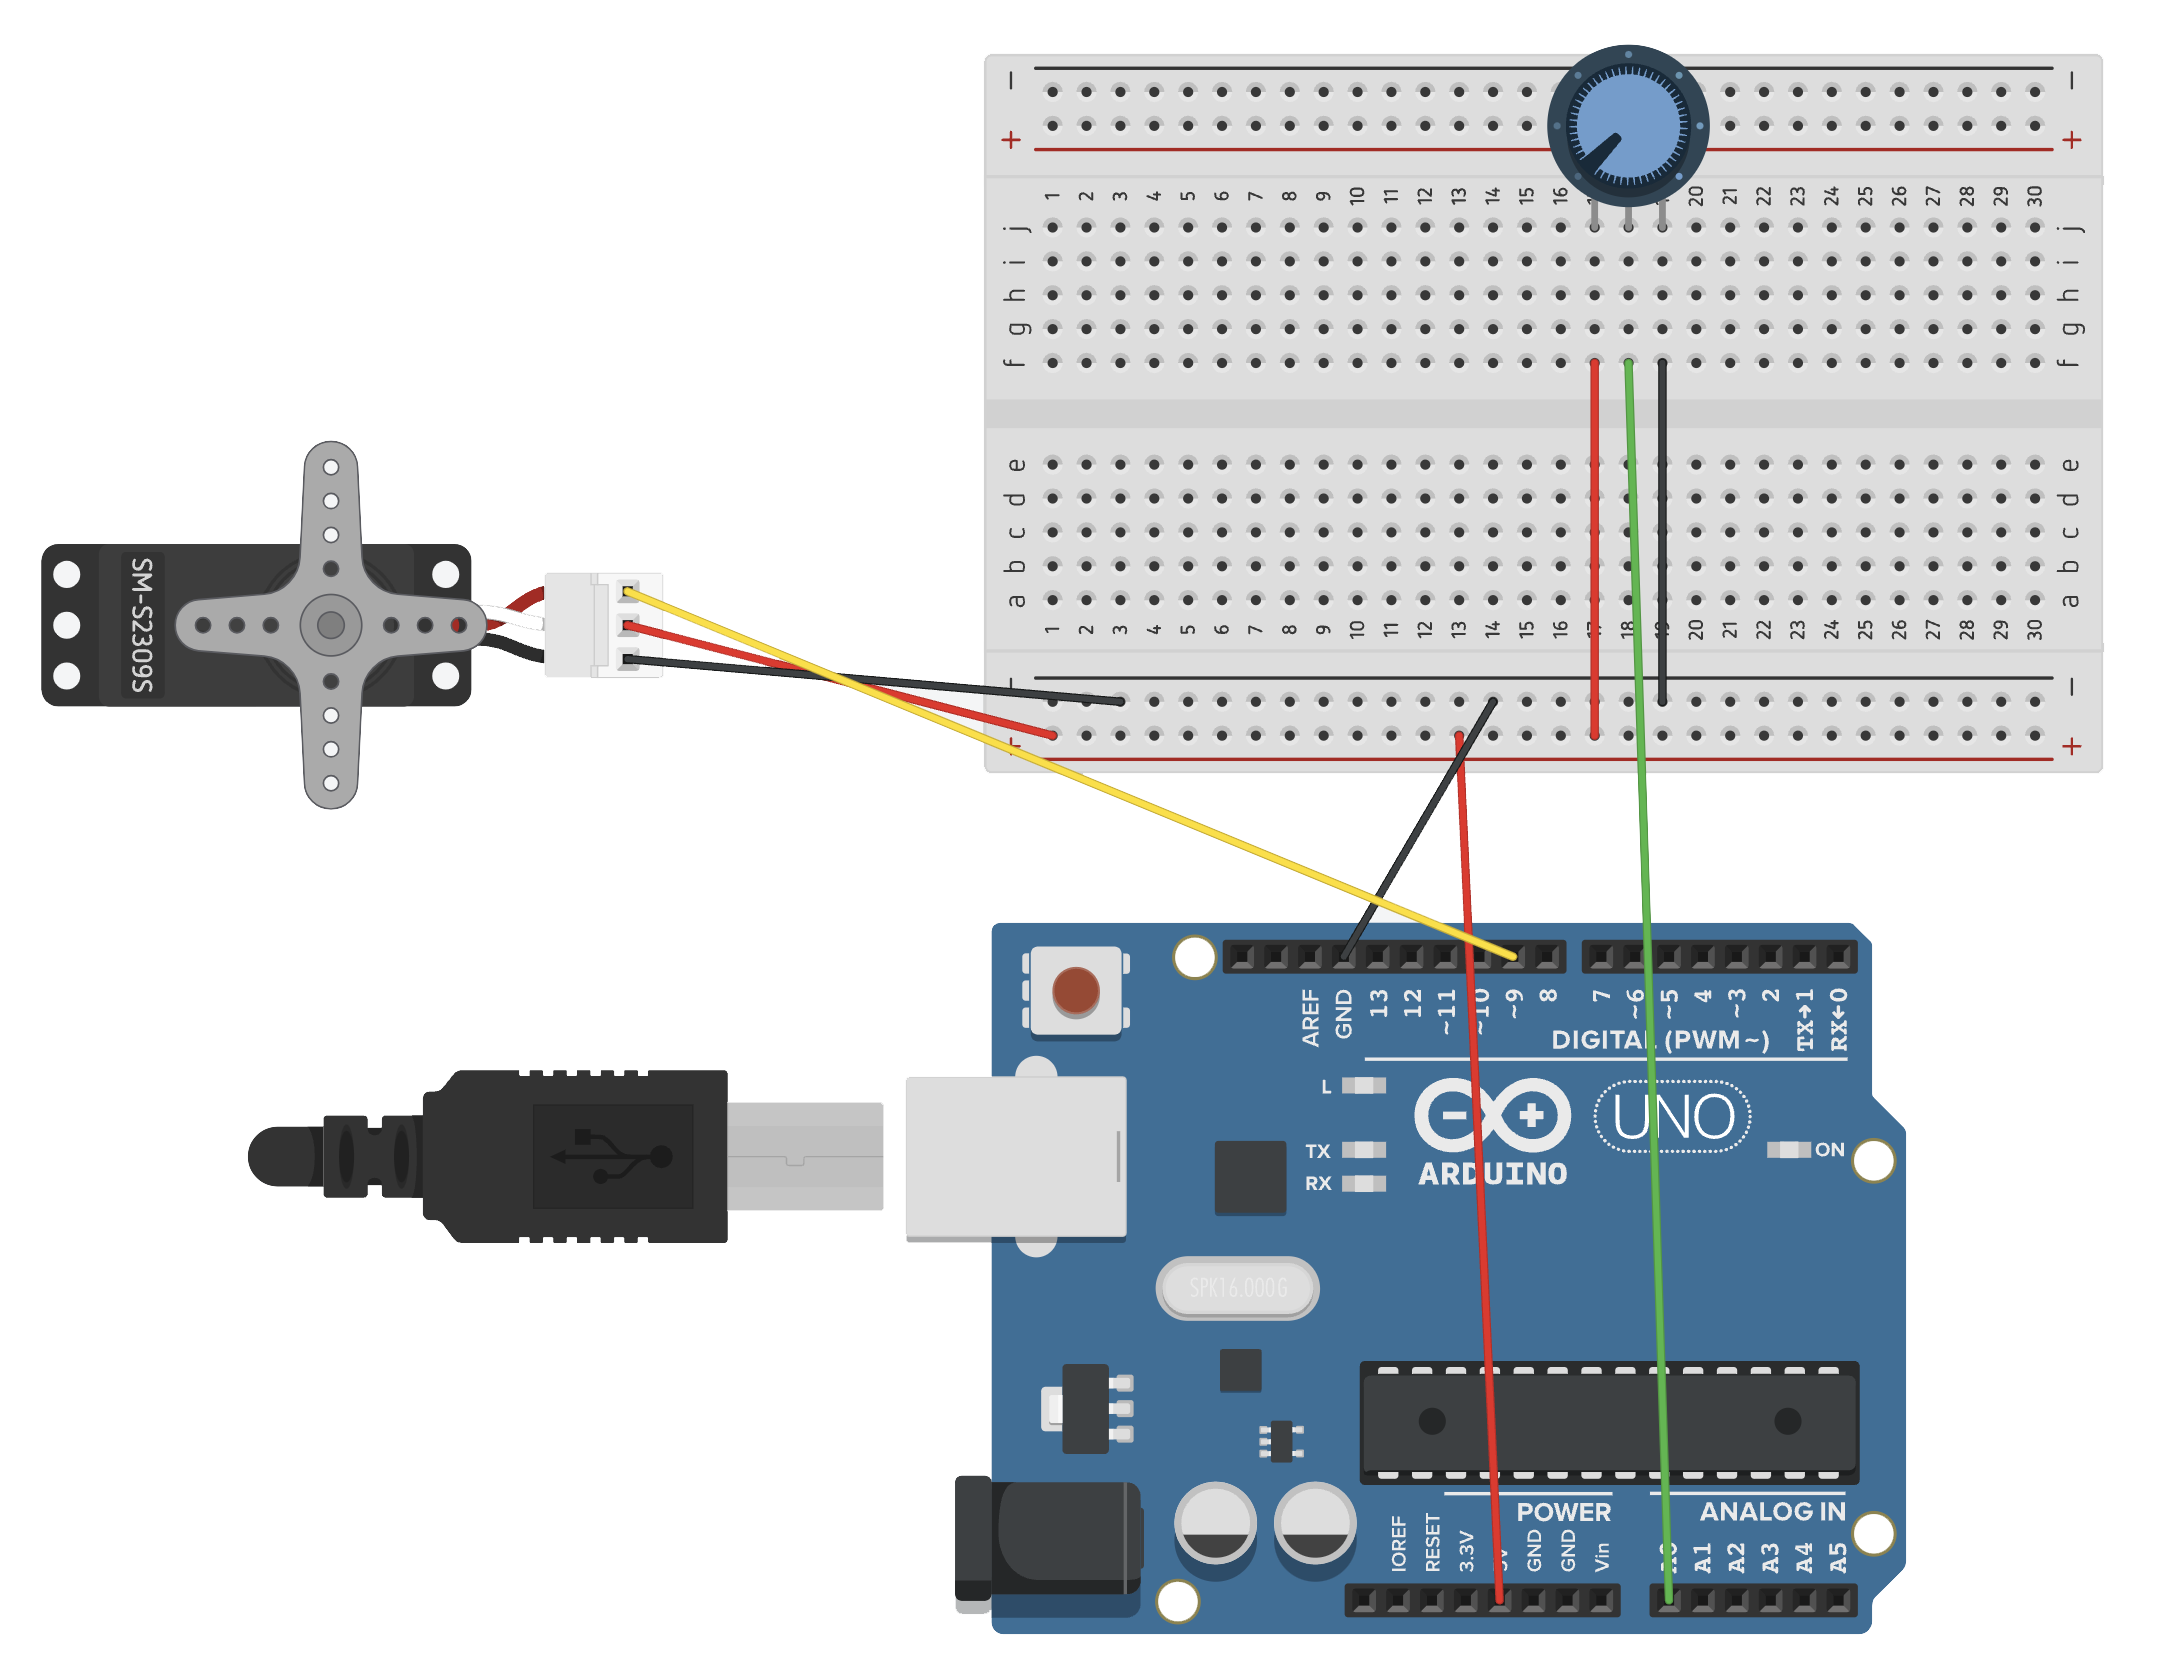
Positional servo with knob
Servo with knob
File > Examples > Servo > Knob
/*
 Controlling a servo position using a potentiometer (variable resistor)
 by Michal Rinott <http://people.interaction-ivrea.it/m.rinott>

 modified on 8 Nov 2013
 by Scott Fitzgerald
 http://www.arduino.cc/en/Tutorial/Knob
*/

#include <Servo.h>

Servo myservo;  // create servo object to control a servo

int potpin = A0;  // analog pin used to connect the potentiometer
int val;    // variable to read the value from the analog pin

void setup() {
  myservo.attach(9);  // attaches the servo on pin 9 to the servo object
}

void loop() {
  val = analogRead(potpin); // reads the value of the potentiometer (value between 0 and 1023)
  val = map(val, 0, 1023, 0, 180); // scale it for use with the servo (value between 0 and 180)
  myservo.write(val); // sets the servo position according to the scaled value
  delay(15);              // waits for the servo to get there
}

Temp/humidity sensor (DHT11)
/*
 * Created by ArduinoGetStarted.com
 *
 * This example code is in the public domain
 *
 * Tutorial page: https://arduinogetstarted.com/tutorials/arduino-temperature-humidity-sensor
 */

#include "DHT.h"
#define DHTPIN 2        // Pin where the sensor is connected
#define DHTTYPE DHT11   // Sensor type

DHT dht(DHTPIN, DHTTYPE);

void setup() {
  Serial.begin(9600);   // Start Serial communication
  dht.begin();          // initialize the sensor
}

void loop() {

  delay(2000);           // wait a 2 seconds between measurements.


  float humi  = dht.readHumidity(); // read humidity
  float tempC = dht.readTemperature(); // read temperature as Celsius
  float tempF = dht.readTemperature(true); // read temperature as Fahrenheit

  // check if any reads failed
  if (isnan(humi) || isnan(tempC) || isnan(tempF)) {
    Serial.println("Failed to read from DHT sensor!");
  } else {
	 // Output data to serial monitor
    Serial.print("Humidity: ");
    Serial.print(humi);
    Serial.print("%");

    Serial.print("  |  ");

    Serial.print("Temperature: ");
    Serial.print(tempC);
    Serial.print("°C ~ ");
    Serial.print(tempF);
    Serial.println("°F");
  }
}
Future Applications and Beyond
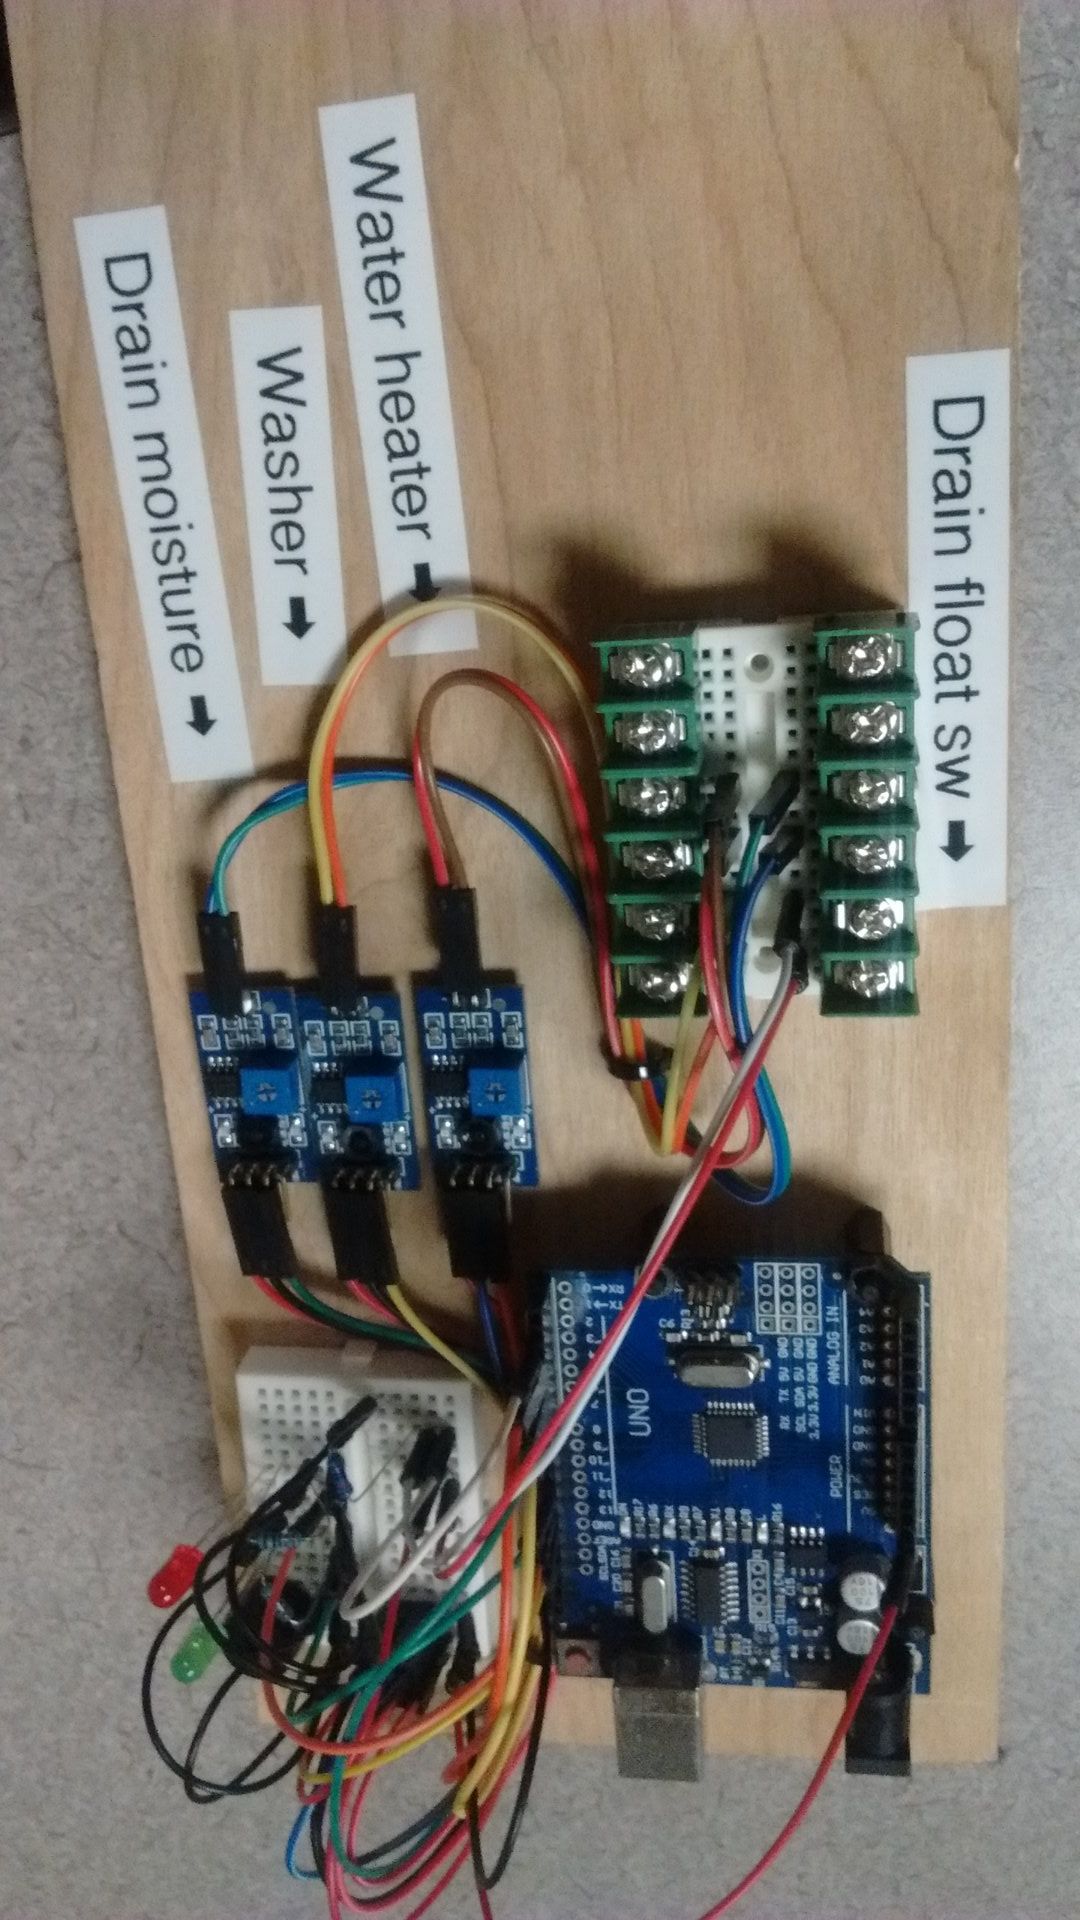
Basement Flood Alarm by PM4

RoboGrazer by flappydunk
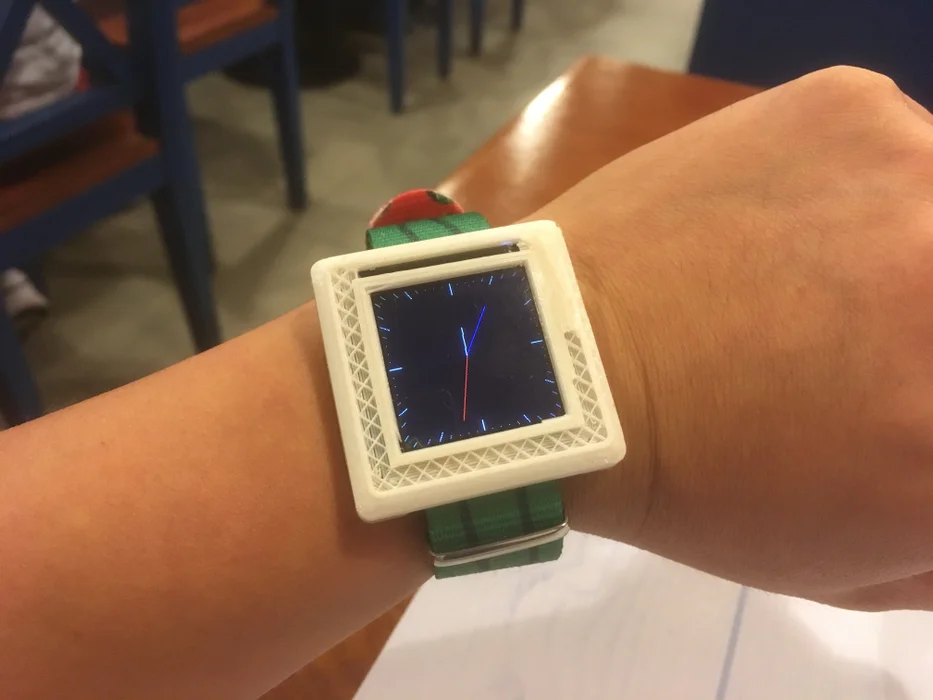
Arduino Watch by 陳亮
Mini Golf interactive course elements, (credit: Chris Myers)
Autonomous Cooler that follows using GPS by [Hacker Shack](https://www.youtube.com/watch?v=vGDMpLMkWFg/)
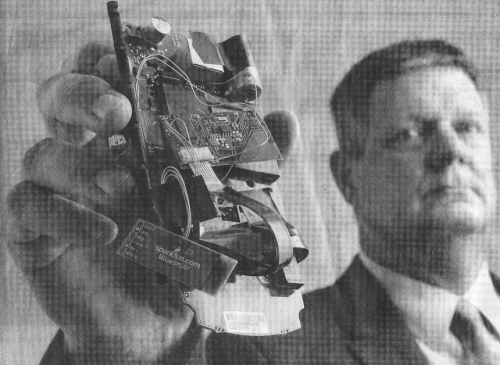
SparkFun parts in nefarious projects (source)